Well, sticking with my resolution to have trees for my UMG modules at the Truro Train Show in October I have been fairly busy. I’ve spent quite a few evenings since MudFest making trees while watching TV.
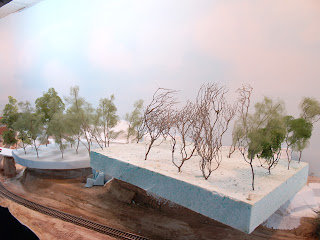 Two groupings of future trees.
I use natural materials for tree forms. The trees in the background are made using the dried flowers of False Spirea. I harvest these during the winter when the old seed pods are very dry and crumble off the stem easily. The trees in the foreground use a type of plant that I don’t think we’ve identified yet. They grow in, amoung other places I’m sure, the field behind Jon Huneault’s house in Aylesford, N.S. They have lots of fine branches and look like a very bushy tree.In either case, I use Woodland Scenics Polyfiber for fine branches. Pull a small amount of the polyfiber off the bunch and roll it into a tight ball. Then start pulling it out, teasing it, until you have a very light and airy puffball. It should be teased out fine enough that you could lose it if you dropped it on the floor. I make a bunch of these, some small and some large for variations of branch sizes before moving on to the next step.
I put a fine coating of white glue on the branches that I will be attaching the polyfiber puff balls to. Then I either skewer the puffball with the branch or drape it over the branch. You can leave some branches leafless to simulate dead branches.
Remember the leaves of some real trees do not go around a branch in a perfect circle. You should also remember that not all trees are perfect globular forms. Real trees can have branches sticking out at odd angles and have clumps of leaves outside the main canopy of the tree.
The final step is to apply the leaves. I used to use cheap hairspray as adhesive to attach leaf material. It’s fine for trees that get planted on a home layout and never get moved, but trees that are transported for a portable layout need something more. Lately I’ve been using clear, mat wood finish (Varathane). It’s a little more expensive than hairspray, but I think it will hold up better.
I use different leaf material depending on the type of tree I’m attempting to replicate. I use regular ground foam for smaller bush type trees – ones that typically have smaller leaves. For larger trees I use a product I discovered a couple years ago by accident – leaves from Selkirk Scenery. If you’ve never visited Bill’s site before you should check out his “How To” links. He makes some incredible scenery!
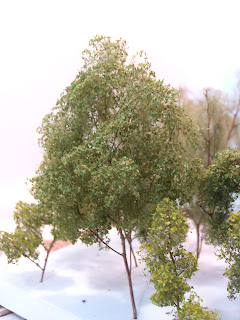 A tree made with Selkirk Scenery
leaves and False Spirea stem.
Anyway, spread out some newspaper to protect the floor from the adhesive and to catch excess leaf material for re-use. It’s a good idea to have two areas of newspaper, one for spraying and one for excess leaf material. I start by spraying the underside of the tree and sprinkling a darker shade of leaf material over it, from the bottom up. This will simulate leaves shaded by the upper branches. Shake off the excess leaf material and spray another coat of adhesive to secure the leaves. Now, spray adhesive from the top down and sprinkle on a lighter shade of leaf material. Shake off the excess and spray another coat of adhesive.
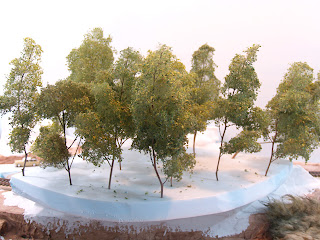
Once the adhesive dries the tree is ready to plant.
It may take a few trees to get the knack of which colors work best for your layout, and your lighting conditions. Before you know it you’ll have a whole forest of trees on your layout.
 I’ll have more on making trees in future posts.
Have fun making and planting trees!!!
Scott


