Decoder Identification – part deux

Well from the responses I’ve had it could be either an NCE N103 or a Lenz LE103. I have not been able to find many images of the decoders, but from the descriptions I’ve found they don’t sound like the one I have. I believe that both have a rear light function (yellow wire) which mine does not.

Now, Don Parnell pondered that perhaps the yellow wire got broken off at some point before the installation so the installer just connected the rear light to the green function wire. I’ll look a little more closely at the decoder later to see if there’s a conspicuous solder tab missing a wire.

One thing that seems odd is that DecoderPro identifies it as an NCE decode, yet I was told it was a Lenz decoder when I bought it, and a Lenz decoder was one of the suggestions. Could DecoderPro make such a big mistake with the decoder family?

Thanks for the help to this point folks!

Scott

Decoder identification help, please

Does anyone know what decoder this is? DecoderPro identifies it only as an NCE decoder, but nothing more than that. I can’t find one on the NCE site that quite looks like it.

w-p1125912.jpg

It is about 1″ inch long by about 3/8″ wide.  It only has one headlight function, white wire, and two other functions (green and purple wires), but no yellow for rear light.  I want to see if I can reconfigure the green function to work like a rear light for directional lighting.

I’ll likely just end up replacing the decoder to get proper light functions.

I appreciate the help.

Scott

Inspirations

I thought I’d share with you some web sites that have proven inspirational to me. There have been several over the years that I have been involved in model railroading. Here are two of many. I’ll post others later.

The first is TrevinoCircle – The Home of the Wiscassest, Trevino & Western (click on the “Placement of Stuff” link in the sidebar). James is obviously a fan of George Sellios’ Franklin and South Manchester (so am I). John Allen is probably another one of his influences.

The thing I like about James’ site the most is that he doesn’t just show photos of his scenery and detail. His are almost step by step (before, during, and after) photos of the scene as it develops. The unfortunate part is that he doesn’t go into great detail with descriptive text about how he does some things. Still, his tenements (scroll down on this page or view the Tenement Back Lots) provided the inspiration for my own tenement. I continue to refer to James site off and on for ideas.

The second is Twofoot Bill’s site. He has some amazing pictures and some great how-to’s for doing scenery. These are the two pictures from his site that I’ve used as wallpaper for both my monitors for several years. They are views of the same scene from opposite directions. Now that the BS&T is getting some scenery (and my photo skills are improving) my wallpaper may change.

Yes, it’s O scale but you can apply a lot of his techniques in smaller scales to get very good results. I use Selkirk Scenery leaves for my deciduous trees and have had great comments about them.
Have fun! Perhaps you could share some of your sources of inspiration in the comments section.

Scott

Model Railway E-Passes

svr_006.jpgMy old Summer Valley Railway web site had a links page made up of model railway e-passes. I collected e-passes for 3 years from 2000 to 2003. In that time I gave out 58 passes and received 39.

These are a great way to include links. Rather than just plain text, there is an image that can sometimes portray the layout theme or style. Plus, lthey are really cool to collect.

My intention with this series of posts is to present my collection of E-Passes, or at least those that still have active web sites to link to.

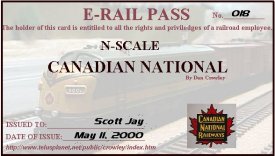
The first e-pass that still had a working link is to Dan Crowley’s web site for his Yellowhead Railway Company Ltd. The e-pass pictured above is the one I sent to him in exchange – the 6th one I gave out.

He has some great tips in his “Helpful Hints” section and his “Projects” page (accessed from the “Weekly Picture” link) has a few pictures of structures on his layout.

So, here’s the pass to Dan Crowley’s model railway, Yellowhead Railway Company Ltd (click the pass to visit his site)….

18_scott_jay.jpg

Scott

Kenville the Green

And soon to be wet!

I was able to get a little scenery work done around Kenville last weekend. I also fixed up and prepared the pond for water.

2008-01-06-kenville-1.jpg

Stuff everywhere! The next operating session is in a little over a week so I have plenty of time to get it cleaned up.

2008-01-06-library.jpg

2008-01-06-miraclechairs.jpg

2008-01-06-pond.jpg

The cattails are green floral wire and brown floral tape. It’s a very simple process. Just cut the floral wire to the appropriate length, cut a piece of floral tape to size (trial and error to determine the best size), and wrap the tape around the wire near the top of the stem. Drill a hole and plant.

Later!

Scott

Signs, Signs, Everywhere A Sign

Well, almost everywhere.

I’ve been getting tired of the little tabs I have on some structures with the name of the business. I’d much rather have proper signs.

I did a little project before Christmas for one of my daughter’s friends. She was giving her father a model of his fishing boat. She was going to have Kim paint the name and registration numbers on it. When I saw the picture of the boat I realized how difficult that would be because of the shadow effect used. I offered to create some decals using Photoshop. I tried clear labels since I couldn’t find my water slide decal paper. A half hour later and it was done – quite a close match to the original as well.  She and her father were happy.

Anyway, that got me thinking that I might be able to use the clear labels to make signs on structures. So, I played with Photoshop on the weekend and produced a few signs. Some worked better than others.

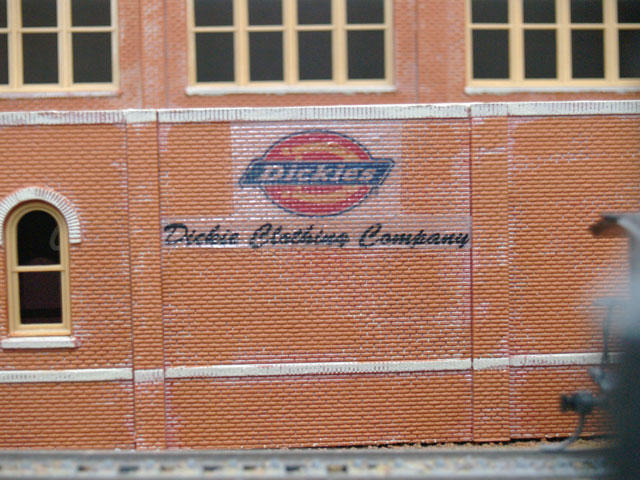
2008-01-06-dickie.jpg

I’m not particularly pleased with the Dickie Clothing Company sign. I should have trimmed the label closer to the printing.

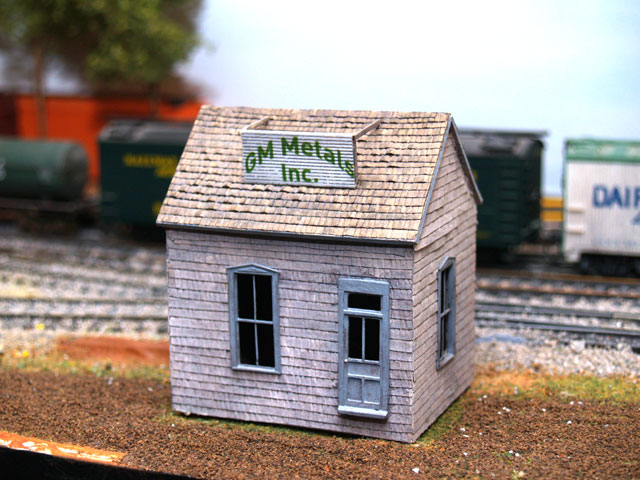
2008-01-06-gmmetals.jpg

This one turned out well. I realized I need to do some detailing work around this building (in Stevenville). It might get priority over the Lighthouse and Kenville this week.

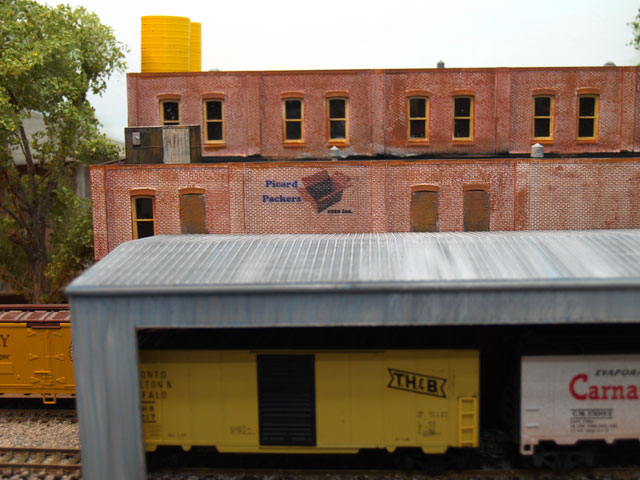
2008-01-06-picardpackers.jpg

I learned from the Dickie sign and trimmed this sign much closer. I think it looks pretty good!

I have more signs printed, and many more to print. Keep looking for signs in future posts.

Scott

A Light In The Harbour

Well, someday. I’ve been working on and off on a Builders in Scale lighthouse kit for the harbour in Chappellton. It will be called MacLellan’s Point Lighthouse.

2007-12-30-lighthouse-1.jpg

This picture was taken on December 30. The paper shell is attached, but that’s about it. The pewter bits were just set in place for the picture. The shingles, windows in the main structure and light housing, and the entry still need to be added.

Here’s a picture as the building looks now…

2008-01-06-lighthouse.jpg

I must appologize for the picture quality. I took it last evening when I realized I hadn’t taken pictures to post in a while. It was after our operating session (late) so I didn’t take much time to set things up. I’ll have better ones later.

The Builders in Scale shingles were quite easy to work with. Unlike the Campbell shingles they are on a self adhesive sheet, like labels, and can be easily stained and weathered before being applied to the structure. This makes for a much more random look to the shingles.

The most frustrating part of construction was the windows around the light housing. The pattern to cut and scribe the “glass” is just a hair too big. Also, the “glass” provided in the kit was very brittle and broke along the score lines. Fortunately I have some other window material that worked well. You can see some of the rejects in the box in the lower right.

There are still a few more details to add and I have to construct the walkway leading to the entrance. Then I’ll have to figure out where the lighthouse should be to guide ships safely into the harbour. Then there’s the harbour to complete, and the scenery around the lighthouse, and the water, waves, ships…..

Scott

CP Piggy-Back

Don Parnell has had a flat car with piggy-back trailers that I’ve envied for a very long time. I’ve attempted walking off with them, but got caught. No amount of money I offered was enough (not like I offered him a fortune for them or anything.

2007-12-30-freightshed-1.jpg

I finally found some at Hobby Junction in Montreal when I visited there last month. So, Don – are you wishing you had accepted my offer? Too bad ’cause it would have gone up the next time I saw you.

I have a piggy-back flat that I’ll have to re-decal for CP so I can haul these beauties around the layout.

Scott

From “Fuel Service” to “MobilGas”

This is another Bar Mills kit, but I’ve had this one since the Truro show last fall.  I finally got around to assembling it.

2007-12-30-mobilgas-1.jpg

(I wish I could crop – @#$#$% Photoshop!)

In case you were looking for something new, it’s the MobilGas billboard in front of the red (soon to be) tanks.  Although the parts were very tiny and breakable it was a very simple kit to assemble.  Now my generic “fuel service” business has an official name!

Scott

Miracle Chair Company

“If it’s a good chair, it’s a Miracle”!

That’s what sign overhead proclaims at Miracle Chair Company. Judging by the rejects sitting out front I can see why! They seem to have a problem getting all the legs the same length.

2007-12-30-miraclechair-1.jpg

This is a Bar Mills kit that I picked up at Hobby Junction in Montreal. It’s a small building, but has lots of details and should blend into the small town quite well. I had to make the foundation of the building fairly high for the loading dock to work so I used 3 layers of craft foam. I added another layer cut to the inside dimensions of the building to help hold it in place. A little bit of plaster will blend it into the surroundings.

2007-12-30-miraclechair-2.jpg

Some grass, bushes and other details should finish this off quite nicely.

Later,

Scott