A Quick Look At The Development of Stevenville

I thought it might be nice to take a look back and see how Stevenville has developed over the last year and a half, or so. Well, that turned into a very long post, so I’ve condensed it into the Readers Digest version. It’s still a long post though. I’ll update this post every month or two with photos of new work

March 2006

w-dscn3743.jpg

This is the very first photo of the Stevenville area. I’m not even sure if I had named the town at this point. I certainly had no idea what it would eventually look like!

April 2006

stevenville-2006-04-09-2.jpgstevenville-2006-04-09-1.jpg

A little more than a month later. We’ve had our first operating session on the layout, only two months since starting work tearing down the old layout. I unpacked all the structures from the old layout and have them distributed around the room, but it’s a pretty meager assortment. The old layout was only about 1/3 the size of this one so it’ll take a whole lot more buildings to satisfy the local real estate market.

May 2006

sv-1.jpgsv-2.jpg

A month since the last photos. G-Mac Transfer (the blue building near the center of each photo) has been movd from Chappellton to try to balance out operations. Other than moving structures around there hasn’t been much done with scenery. I need to make sure the buildings are where I want them to be before I do too much else.

January 2007

claytonandderwin.jpgclaytoninstevenville.jpg

There wasn’t a whole lot of new developments over the summer or fall of 2006. We still operated during that time, but there are usually other activities over the summer and fall that take time away from the layout. The guys were bugging me during op sessions about getting some scenery work done, to get rid of the “ocean” look of the blue foam. So after Christmas we postponed operating for a few weeks and went to town (almost literally) doing scenery work. You can see Derwin and Clayton in the photos above working in Stevenville.

February 2007

tenement-2007-02-07-1.jpgstevenville-2007-02-07-2.jpg

frontstreet-2007-02-07-1.jpgfrontstreet-2007-02-07-2.jpg

A month later and a lot has changed! Scenes are really starting to take shape. It’s amazing how quickly a layout changes when paint and ground covers start to go down. I made some foam block buildings ( in the background) to try to fill in some empty spaces. They don’t look too bad in pictures but not so great in person.

March, 2007

tenement-2007-03-19.jpgstevenvilleservice-2007-03-01-1.jpg

A little more than a month later. I’ve been working on other areas of the layout, so there haven’t been too many changes in Stevenville. I’ve done a little work around the Tenement and put together a fueling service kit, but not much else.

April 2007

acrossthetracks-2007-04-29.jpgtenement-2007-04-29-1.jpg

In the previous month I’ve been working on other areas of the layout, but pop in to Stevenville every once in a while to do some work. These photos are some of the small scenes starting to develop in the town. You can see that the former Picard Packers factory has been moved into the downtown area to make way for a new factory.

May 2007

pp-2007-05-27-1.jpgpp-2007-05-27-2.jpg

The big news during this month is that Picard Packers gets a new factory. The original building was moved into the downtown area a while ago and will serve as corporate headquarters.

November 2007

op-1.jpgop-2.jpg

Again, during the summer and most of the fall work on the layout almost comes to a standstill. I’ve only recently started some new scenery on the layout. You’ve seen these pictures in my post on the latest operating session. I have done some work here recently.

Scott

Kenville Station

Instead of working on scenery on Sunday I decided to start on a kit I picked up during our visit to Saint John last winter. It’s a small CPR Branchline Station by Kanamodel Products.

kenvillestation-3.jpg

This is my first laser cut kit. I was a little surprised to see cardboard, or “chipboard” as they call it, in addition to wood in the box. I figured the kit would be all wood. Then again, I’m used to working with cardboard.

I started by reading the directions from cover to cover to familiarize myself with the construction. YEAH RIGHT! Get a grip on reality! I jumped right in as usual! Though, to be honest, I did read a bit of the instructions – at least until I got bored with it.

I may not have read the instructions completely before starting the kit, but I did follow them closely. I’ve had too many experiences of getting ahead of myself when building a kit and then trying to figure out a way to redo something. It’s never a good thing.

So, on Sunday I got the walls shingled and assembled, the interior partially painted, and the doors and windows installed. The upper wall sections are “chipboard” and the lower 3′ are scribed wood. The shingle are Campbells paper shingle strips.

kenvillestation-1.jpg

Kenville Station as of Sunday, Nov. 18, 2007

Monday evening turned out to be a long evening helping Brian and Ted with their computers.

I got back at the station on Tuesday evening. I applied the horizontal wood trim to the top and bottom of the wood sections of the walls. Then I started working on the roof. The roof is “chipboard” and Campbells shingles. Because it is a hip-style roof there are 4 sections to shingle. I got the back side done on Tuesday.

roof2.jpg

Most of Wednesday evening was spent with the guys at Bruce’s helping him work out a yard plan on his layout. I managed to shingle the two ends of the roof before we left, and finished shingling the front section after I got home.

Next I have to find a way to hold the roof sections in their folded position to glue them. The instructions say to use weights so I’ll have to see what I can dig up.

Hopefully the next update will have a completed Kenville Station. That means that after I get tired of working in Stevenville I’ll start doing scenery in Kenville.

Scott

Stevenville – Ballast and Grass

I got the urge last Friday evening to try to finish up the scenery work in Stevenville. As usual, I went to the layout room with the intention of doing one thing and ended up doing something completely different. Unfortunately, I can’t remember what I originally went down there for!

Anyway, I started by trying to find a wall wart to power the neon “Cafe” sign I have. I couldn’t find one that put out 3 volts. I figured a fascia mounted switch on the battery pack would be almost as good. I did that and put the cafe back into place. Flicked on the switch and NOTHING. I tried it and the @#@# sign didn’t work. I mucked around with it for a while and determined I must have done something to the EL panel while try to get the wires and building into position. Crap! I will eventually get another one from Miller Engineering. BTW – They have some amazing lighting products!

So, the next thing I decided to tackle was finishing the ballast through Stevenville. I figured that would be less frustrating. I was right. Months ago I had ballasted about 1/2 the main line through town and after about an hour I had the rest of the mainline ballasted and a bit of grass along the tracks beside the tenement and down to the service shed (from the tan truck along the tracks back). While I was working in the area I put some more secure end of track devices (railway ties sunk in the ground) at G-Mac – the blue building at the left. That was it for a busy Friday evening. Sorry about the bottles and tools in the pictures.

stevenville-2007-11-18-1.jpg

After spending the whole day cutting stuff for Kim to tole paint I got back to work on Stevenville in the evening. The picture above shows the passenger siding ballasted, but I didn’t do that until Saturday evening. I started some scenery around the buildings on Front Street.

stevenville2.jpgstevenville-2007-11-18-3.jpg

This will probably be one of those times when I am temporarily obsessed with this project and will work at it every available moment until it’s done, or I get sidetracked with something else. I’ll likely have more Stevenville updates soon.

Scott

Addendum to Improving a Bachmann DCC Equipped GP35

Apparently NCE has a replacement board designed for this locomotive. The Bach DSL decoder will fit in place of the old decoder and apprently includes LED’s.

Bach DSL Decoder from NCE

And they are quite affordable too. A quick search indicated prices ranged from $15 to $20 US. I wish I had thought to look for these a few weeks ago. Oh well, the D13SR’s work fine.

Scott

Making My Operators More Comfortable

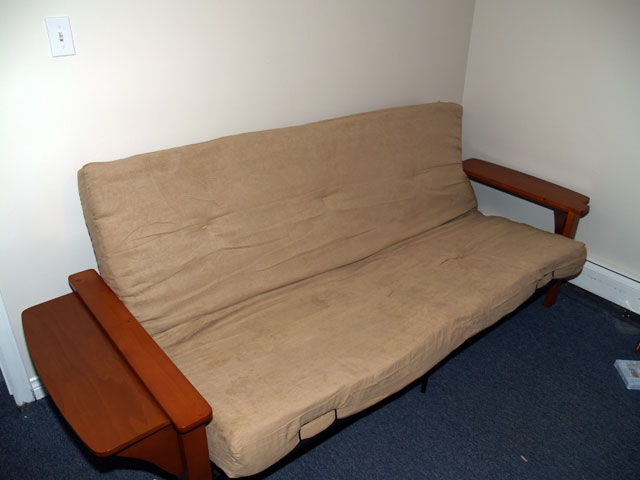
The crew lounge was a little more comfortable for the operators this past Sunday. I’ve had my eye on a futon at Wal-Mart for a while and when it went on sale I put it on layaway. I picked it up last week in time for the next op session on the BS&T.

futon-1.jpg

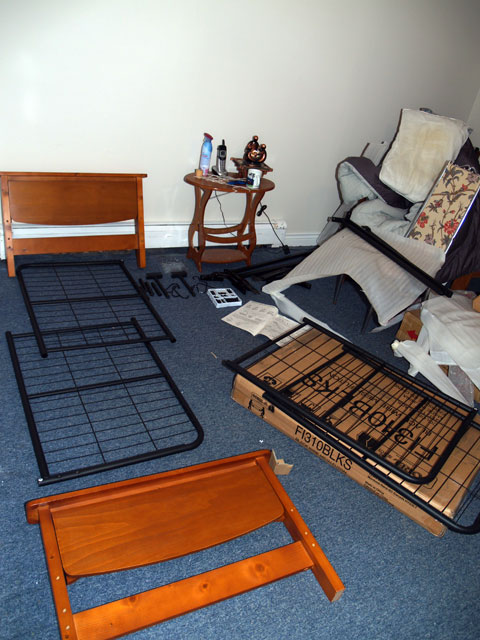
It wasn’t to difficult to assemble, but I made a few errors and to had to assemble parts of it twice. Anyway, it’s quite comfortable and can be used as a bed when out of town operators visit.

futon-2.jpg

The thing I liked about it the most was the lift up side tables attached to the arms.  They fold down when they are not needed.  A decent coffee table will complete the picture.

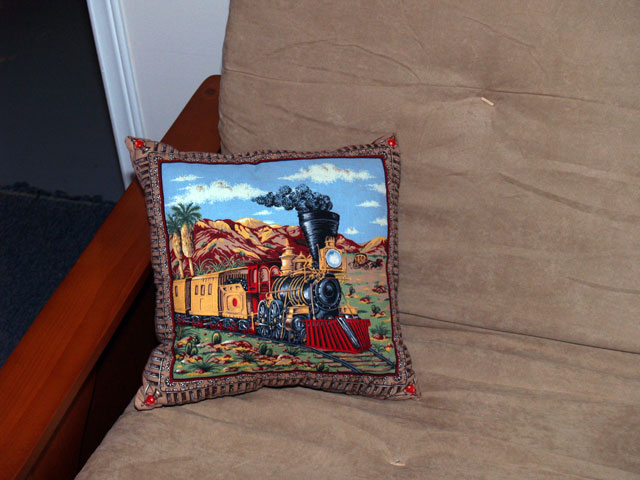
Kim bought some great pillows for it on Sunday. I’ll have to get pictures of those. They are quite appropriate.

Scott

Improving a Bachmann DCC-Equipped GP35

I bought a couple of these locomotives about a year ago from our local model railroad supplier. I needed some extra power on the BS&T and because they were real cheap (<$40). I figured I couldn’t go wrong at that price!

Well, they ran “ok”, but had poor slow speed performance and hummed very loudly. You know the decoder hum you get from some cheap decoders? What did I expect for $40?

A couple months ago I bought a few NCE D13SR decoders for various locos I had without decoders. I planned to try them in these locos to see if it would make much difference. Well, I finally got around to that last week – while Kim was off to the states taking advantage of the high Canadian Dollar.

When I removed the fuel tank covering the body mount screws I was surprised to see a mess of capacitors and resistors attached to bachmanndecoder-2.jpgthe motor contacts. A capacitor was attached to each motor contact and then back to the metal casing around the motor. Another capacitor was attached across the motor contacts. The resistors were attached between the power wire and the motor contact. The picture shows the underside after cutting off the capacitors.

I wondered if these might be causing the noise and performance problem. I figured the resistors were okay, just holding back some power to the motor, but I cut off all the capacitors, being careful not to cut the power lead. There was no difference when I ran the loco. So I went on to decoder installation.

After removing the body I saw that the decoder was a long one and that the LED’s were soldered directly to the board. I would have to figure out some way to mount the LED’s after I installed the D13SR decoder. As I was pondering that I noticed the decoder was screwed to the frame at each end just behind the LED’s. Then I thought that since this decoder was crap anyway why bother trying to save it? So, I used my razor saw to cut the decoder just behind each LED and screw. The old circuit board became the LED mount.

Next I unsoldered the wires from the now dead decoder. Double sided tape held the new decoder securely on the frame. I positioned it so that the wired end was roughly centered in the loco. I figured I could use the existing wires to do the whole install, including wiring the LED’s.

Bachmann used orange and purple wires to the motor (the standard is orange and grey). I figured I’d use the purple wire for grey and see how it worked out. I unsoldered the orange and grey wires from the decoder and soldered the motor leads in their place.

I trimmed the red and black wires to reach the nearest pickup leads and used the bit I trimmed off to run back to the other pickup leads. I made sure I put the shrink tubing on before I soldered everything together.

I trimmed the blue wire so that the 1000 Ohm resistor (as per the decoder’s instructions for use with LED’s) would reach to the nearest LED. The length of blue wire I trimmed off almost reached the other LED so I had to scrounge for another wire to run from one LED to the other.

I wasn’t sure which lead of the LED was the anode or cathode side so I had to wing it. I soldered the resistor to one side of the nearest LED and joined this to the same side of the other LED. Then I soldered the yellow wire to the other lead of the rear LED and the white wire to the other lead of the front LED.

bachmanndecoder-1.jpg

This is the loco with the D13SR installed.

Then came the moment of truth. You should always test a new install by putting the loco on the programming track and attempt to read a CV. If that works without an error then you have no shorts. Once I knew the decoder was installed properly I put the loco on the main line and checked operation.

Wow! There wasn’t a sound as the loco moved down the track! But I had the leads on the LED’s reversed so the lights didn’t work. Back to the bench to switch the leads and back to the main line. The lights worked and the engine ran like a top.

The second loco took half the time and I didn’t mess up the LED’s. It also had a bit of a motor growl, but neither had the same power hum that they had before.

Brian called then with a computer problem that I was going over to help him with. I mentioned the locos and he asked me to bring one over so he could see it run. He was totally amazed at the difference. He had an Athearn CN GP35 shell that we determined would fit on the Bachmann frame with a little modification. So, off to Menzells’ to pick up another of the CP units he had so Brian could install a D13SR into and fit his CN shell on. I’ll get pictures of his unit when we operate there in a couple weeks.

op-141.jpgI decided that they ran so well they were worthy of being weathered. Here they are waiting to go to the service tracks in Tidewater during a recent operating session on the BS&T. Two very nice running locos with new decoders for about $50 each.

Later!

Scott

The BS&T – Pre-Operations

The layout gets pretty untidy looking the weeks before an operating session. Every time I need something for Kim’s craft stuff, or decide to work on something “railroady” I open drawers and cupboards and rarely close them. I’ll only have to open them again when I need to get something else, so why bother. Ha!

Then when I bring stuff back down I just set it inside in a convenient spot where I can get at it quickly later on.

So, after three weeks of doing that it really does get quite untidy. These pictures sort of show what I mean. It really is quite tame this time, not sure why. It has been a lot messier.

pre-op-session-1.jpgpre-op-session-2.jpgpre-op-session-3.jpg

I try to start tidying a day or two before an operating session. Most times I’m putting stuff away as the guys are arriving. There’s always last minute stuff to do, especially when you leave things ’til the last minute! Ha!

Scott

Operating – Nov. 11, 2007

Well, we were short one expected operator, but with 5 it was more than we’ve had on the BS&T in many months.

As usual, jobs were picked on a first come/first pick basis. Mark – the newbie and first to arrive – chose to run the Thumper, the west wayfreight from Tidewater to Bayside. Greg decided to keep his usual job as the local switching in Stevenville/Derwin’s Drop. Ken followed suit and chose the local job in Chappellton. Derwin and Brian arrived at the same time. Derwin chose the Rambler, east wayfreight from Bayside to Tidewater, and Brian ended up with the Wholeinthall and Transfer Turns. I decided to give Ken a hand since he had a lot of work ahead of him by taking the local job in Kenville.

op-1.jpgThe Rambler arrives in Stevenville. Here it will leave cars for the local to deliver and pick up freight heading west.op-2.jpg

For some reason Derwin decided to leave the Stevenville cut on the service track. Unfortunately, the service track wasn’t built for freight cars and the fueling rack was damaged.

op-3.jpgBrian has already run the Wholinthall west into Tidewater and is now busy making up the transfer from Bayside to Tidewater. The transfer will carry freight destined for Wholinthall so it needs to get to Tidewater before the Wholinthall turn departs.

op-4.jpgDerwin had his share of trouble during the op session. He continued his bad luck into Derwin’s Drop. Apparently he overlooked checking turnouts ahead of him while he studied his setout instructions. He very nearly ran his train into a string of cars sitting at the coal mine!

op-5.jpgKen is busy sorting out his orders in Chappellton. He got the short end of the stick this evening. His pickups and drop offs were easily twice as much work as the Stevenville orders. Good thing I took up the slack in Kenville.

op-6.jpgThe West Bound Transfer is rolling through Derwin’s Drop where it must take on a braking helper. The local switcher is picking up that duty since the helper from Kenville is missing an operator (he’s busy railfanning).

op-7.jpgThe braking helper is required so the large freights don’t pick up too much speed going down the grade at The op-8.jpgRidge. It can be quite tricky taking up some of the slack but so so much that the train is “stretched”.

The helper (right) is cut off near the bottom of the grade and returns to Derwin’s Drop.

op-11.jpgop-14.jpg(left) The West Bound Transfer arrives in Tidewater. Now Brian can start breaking it up so he can build the return train to Wholinthall. (right) Power from the Rambler sits in Tidewater waiting for the service facility to be freed up.

op-10.jpgMark drops off a cut of cars for the Stenville Local to put away. We discovered that the Rambler’s luck continued beyond the run into the Mine. He apparently picked up an east bound car from Derwin’s Drop and took it all the way to Tidewater. It was put on the first train departing Tidewater and delivered to op-9.jpgStevenville, late.

The Wholeinthall Turn is making the run home as it heads into Wholeinthall Tunnel. It’s work day is almost done.

The East Bound Transfer needs help getting over The Ridge. Rather than taking the assigned helper the Kenville local hops in front of the lead loco and provides just enough power to get the train up the hill .

op-12.jpgop-13.jpg

All in all it was a very enjoyable operating session. Next week we’ll be operating on Derwin’s Canadisle Rail.

Later!

Scott