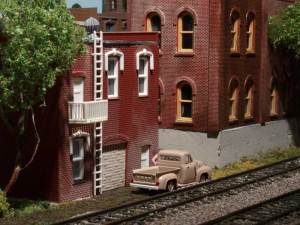
An Operating Day With the Moncton Guys

I know I said a couple weeks ago that my next post would be about operating at Clayton’s, but I’m going to do things a bit out of order.  My next post will be about Clayton’s (yeah, right).  This evening I want to tell you about our operating day with the guys from Moncton.

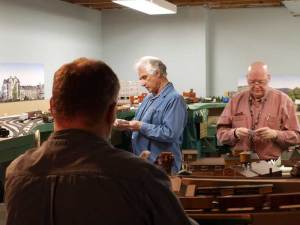
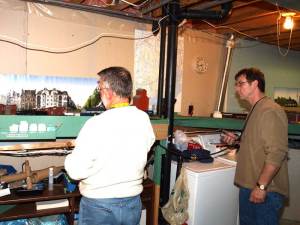
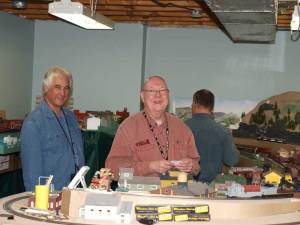
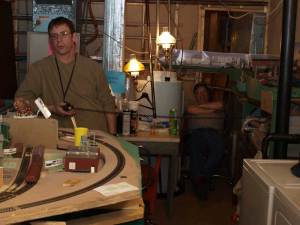
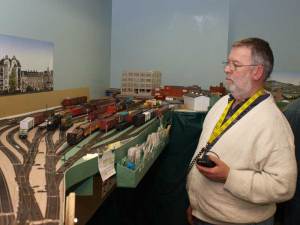
Jim spoke to the weatherman and threatened him with great harm if he didn’t make it a nice day.  It seemed to work because Milne, Jim, John, Murray, and Dave made the trek from Moncton to Summerside this morning.  We arrived at Derwin’s a little after 10:00 this morning and ran a set of orders before lunch and one set after lunch.  The session went fairly smoothly, even though the yard guy was a little slow and had the yard so congested that, well let’s just say it wasn’t a pretty sight.  Then again, Dave’s yard didn’t look to pretty when I was running it either. Demerits all ’round except Derwin and I, of course.  I can’t remember who but someone got 100,000,000 demerits there.

The next stop was to Clayton’s layout.  Jim and John had visited there a few years ago, but the layout was new to Murray, Dave, and Milne.  I think the guys found most of the humorous scenes on the layout, like the murder in the town and the outhouse built out over the cliff (for easy cleaning).  This layout really has a lot of train action for moderately small space.  Even though there was a lot of traffic John and I were able to keep up with the work in the yard and even had time to relax and do some railfanning.  I’m not sure if that was because we were so efficient or if it was because the other guys were slow.  I doesn’t really matter since everyone had fun

The last stop was at the BS&T for supper and then more operating.  Things went quite smoothly.  Derwin didn’t even mess up my new MRC sound equipped Alcos! Since I did the local switching in Kenville I didn’t get a chance to take photos until later in the session. So I don’t have evidence to support the demerits handed out.  But the layout owners in Moncton can rest assured that sufficient demerits were given to the right people (person?).  A little bit of glue will fix that highly detailed old-time passenger car that hit the floor.

I knew Milne had been chomping at the bit  to run a passenger train all day.  So after the regular work was done I gave him his chance.  Unfortunately the RDC developed a shotgun start so while I reprogrammed it I let Milne take the C-Liner and coaches from Wholinthall to Tidewater.  Derwin got to run a rarely seen 0-8-0 powered excursion train, with the aforementioned old-time coaches (sans one – ha!).  The RDC was back in operation by the time Milne made it to Tidewater and he jumped (literally) at the chance to run it from Bayside to Tidewater.  Meanwhile, Jim made the return run to Wholinthall with the C-Liner.

All in all I think the Moncton crew had a great day.  I know we certainly did.  we’re looking forward to doing it again in another few months (after time to recuperate – ha!)

Later!

Scott

Operating at Clayton’s

After an almost 2 year vacation from model railroading Clayton decided it was time to come back.  We spent last Sunday evening there repairing some of the damage that mysteriously appeared since we last operated there.  The list of repairs included the “lift out” bridges, cleaning the track, and replacing the rolling stock on the layout.

We’ll be operating there this evening.  But first we have to put all the freight cars back to where they were, or at lest where the computer expects them to be.  It should be a fun evening – almost like operating on a new layout.

I’ll post some pictures later in the week.

Scott

An Atlas S2 and S4 get sound!

I know it has been a long time since my last post.  I have been busy getting my business going.  The good news is that my business plan is complete and it’s full speed ahead trying to make some cash.

p11203521I did take a break from work this weekend.  I had ordered two MRC 1663 decoders made for Atlas S2’s and S4’s and picked them up yesterday.  I installed one last night and the other one this afternoon.  I took a little more time this afternoon and took a bunch of pictures to show the install.

p11203551The loco I chose for this decoder is the first Atlas S2 (I think) that I bought.  I can’t remember what it was painted for originally but I stripped it and started a paint job on it years ago and never did finish it.  This was one of the first locos I installed a decoder into – long before NCE started producing their replacement decoder made for these locos.  I put a Digitrax somethingorother decoder in it and squeezed it into the cab.  It was a tight fit.  I used the NCE decoders in two other S4’s and it was a much simpler install.

Anyway, back to the MRC decoder…

p11203572

After I stripped out the old decoder I was left with this.  I test fit the new decoder and, as they say in the instructions, I would have to grind a little off the rear end of the weight to fit the speaker.  Some folks say to just remove the top weight and install the decoder, but I decided to leave it.

p11203591The loco I did last night was a used one I had picked up at a show a couple years ago.  It had an old Lenz decoder in it and the previous owner decided it didn’t need the top weight.  When I put the MRC decoder in it there was nothing to grind so the install went very quickly.  There isn’t a whole lot of extra weight to the top section anyway, so you could just leave it off.

p11203611This photo shows where the clearance problem is.  In order to insert the screw to hold the decoder in place the speaker needs to move about 1/16th inch toward the front of the loco.  I took out my trusty Dremel and a suitable grinding wheel and went to work.  I did this well away from the loco so that there was no way any of the fine material would get into the motor.p11203621

I worked slowly so I wouldn’t take off too much.  I didn’t want it to be a hack job.  It didn’t take long to trim off just enough so that the screw hole lined up perfectly.

p11203641

This photo show just how much I had to take off.  You can barely notice the indent in the weight, but it was enough.  I was about 10 minutes into the job at this point.

p11203651The next step was to put the weight back into place and add some electric tape on top to insulate it from the bottom of the decoder.  I’m not sure this step is necessary since the bottom of the decoder looks like it is already coated with insulating material, but it says to do this in the instructions and it is better to be safer than sorry later.

p11203671There is a tab on the bottom of the decoder that makes contact with the top of the motor.  This tab is one of the contacts to supply power to the motor and must be bent at an angle to assure good contact.  The other power contact for the motor is made through the screw that attaches the decoder to the locomotive.

p11203691After I put the decoder in place on top of the weight, tightened up the screw, and soldered the pickup wires the installation is complete – Only about 20 – 25 minutes after starting the job.  The only soldering that was required was to attach the 4 pickup wires that bring power from the rails to the decoder.  The solder pads for these wires are a little small but clearly marked and easy to solder to.  The decoder sat up a little on the speaker end, but flexed back down when the shell was installed.  I think the tab to contact the motor on the bottom of the decoder might have been the cause. I then put the locomotive on the programming track to make sure all was well and then put the shell back on.

I use DecoderPro to program all but the address of my locos.  The software makes it very easy to program decoders, especially sound units.  So I fired up my 12 year old laptop that I use for this purpose and explored the decoder to see what it could do.

p11203761As I expected from previous experience with MRC decoders, there are very few speed options.  They are fine if you run the loco by itself, but it is very difficult to speed match locos for consisting.

p11203741I also found that in order to get the loco to just barely start to move at speed step one I had to adjust the start voltage quite high.  Then when I tried to set the top speed I had to bring the max. voltage wayyyy down, but if I brought it too far down the start voltage would mess up.  So, in the end I decided that good slow speed adjustment was more important than a lower top end and set values of 11 for start voltage and 20 for max.

p11203751Another thing I didn’t like about these decoders is the coarse volume adjustment.  Other sound decoders I use have very fine adjustment of volume, but these decoders have only 4 settings – from 0 – 3.  Setting 2 and 3 are way too loud for my liking.  Setting 1 is a little too loud, but livable.

One other thing I didn’t particularly like was that I couldn’t get the decoders to program on the main.  It very tedious trying out various CV settings to see how they affected the decoder – moving the loco from the programming track to the main track several times while making adjustments.

Other than those things it seems like a pretty good decoder, especially if you don’t plan on consisting the loco.  If you do be prepared for a lot of give and very little take.  I’ll likely not put either of these two into a consist, but I might give it a try.

In the end I think the MRC 1663 is worth the money.  It would be difficult to add sound to an Atlas S2 or S4 using most other sound decoders without a lot of work and modifications.

Later!

Scott

Addendum:

I neglected to mention that on a new install there is a metal screw through the bottom of the frame into the motor.  The NCE ATLS2/S4 decoder includes a nylon screw to replace the metal one to isolate the motor from the frame.  It also includes Kapton tape to be put under the motor to further isolate it from the frame.  The MRC decoder includes neither, but I have read that you can buy nylon screws and that some people have used a small amount of rubber adhesive to secure the bottom of the motor.  In either case, the bottom side of the motor must be isolated from the frame.

Scott

We made it to Moncton, finally!

That’s right, after 2 previous attempts that failed for one reason or another, we finally made it to Moncton yesterday for a day filled with model railroad operations, and 1 trip to the local train store.

We arrived at John’s  a little before our allotted time of 10:00, which was better than the 40 minutes early the Moncton guys were the last time they came to the Island.  Anyway, we chatted for a bit, looked around to see what was new and then Jim made a surprise announcement…

The Presentation

The Presentation

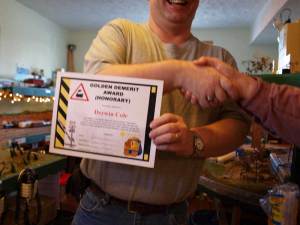
Derwin won an honorary Golden Demerit Award!  Being a past winner of this prestigious award himself, Jim was very happy to present the very first G.D. Award to someone outside of their operating group.  Derwin seemed very pleased to receive the award.  I’m sure it is already framed and hanging on the wall in his train room.

Derwin's Award!

Derwin's Award!

It’s hard to read the text in this close up.  Hopefully Derwin will provide the full text on his blog.

Operating at John's

Operating at John's

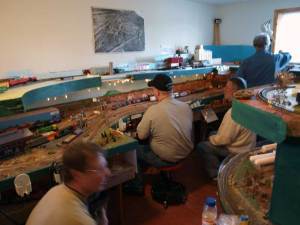
Once the ceremony was out of the way and congratulations were given, it was time to start operating.  Derwin was in the operator’s chair running the yard (a position that may become familiar in upcoming photos), Brian ran several trains, and I worked the local switching job in Riverview.  Now I’m not sure at what point things got out of control, but while I was working extremely hard I noticed this out of the corner of my eye…

Not Operating at John's

Not Operating at John's

Well, when the layout owner got wind of what the new guys were up to he blew his top!  You should have heard the language that was used!  Those guys were really in trouble!

johns-3

Will we be allowed back!?

Well, even after all of this, John still fed us lunch.  I thought I had made myself clear last week when I was told what was on the menu.  Derwin can not eat anything with beans, spice, or food in it.  The after-effects can be deadly.  We joked about how fast we’d get home with the back seat down and the trunk open.  Seriously, we made the 2 hour trip in 45 minutes!

After lunch we were off to Don’s HO for some bargain hunting and Christmas shopping.  Boy, am I going to be surprised Christmas morning with what I think I bought for my wife to give to me. (huh?)

daves-1

Jim working in Baltimore

Then it was over to Dave’s for some more operating fun and hijinks.  Jim worked in Baltimore.  I heard him comment many times that Baltimore never ran so smoothly, or looked as well organized.  I’m pretty sure the layout owner ignored most of those comments.

Meanwhile I worked the yard job.  I noticed a lot of cars returning from Baltimore that should have stayed and been spotted at industries there.  I guess Jim discovered that traffic in = traffic out is an efficient way to keep things looking tidy.

daves-2

Al, Dave, and Jim hard at work. Wait! Jim?

Everyone is reading their cards trying to figure out what they have to do.  I’m pretty sure Jim is putting on an act since he obviously just took the cards for the in-bounds and gave them to the guy running the out-bound train.

daves-3

John and Brian keeping things running smoothly.

John ran the local switching job in <insert town here>.  Brian ran several trains to and from various towns on the layout.

daves-4

They all seem to be having fun.

I think Dave finally started cluing in to what Jim was doing in Baltimore to keep things tidy.  Of course, it didn’t hurt that I told him.

Brian waiting for a train and Derwin...

Brian waiting for a train and Derwin...

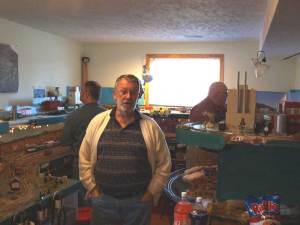
This seemed to be a common sight.  Everyone working hard keeping freight moving on the layout and Derwin in his common position.

John leaving the yard.

John leaving the yard.

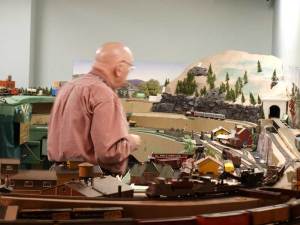
This was one of the first layouts I’ve operated on where steam equipment  was as prevalent as diesel.  John is leaving the yard with his train using a small steam locomotive.  Previously we saw a double headed steam consist leaving the yard bound for parts unknown (Saint John maybe?).

Anyway, that’s the end of the photo tour of our operating day in Moncton.  We had a great time and can’t wait to do it again.  Next it is their turn to come to the Island.  Hopefully by then we’ll have one more layout to operate on.

Time to go for now!

Scott

Our doomed trip to Moncton

We were supposed to go to Moncton last Saturday for a day of operating, but it was postponed due to a death in the family of one of the guys we were going to visit.  We were supposed to go today, but this happened…

7am - November 22, 2008

7am - November 22, 2008

Needless to say we didn’t go to Moncton!  Amazing what a difference a day makes.  I could see green grass yesterday.  Now this is what I see when I look out my front door…

4pm - November 22, 2008

4pm - November 22, 2008

4pm - November 22, 2008

4pm - November 22, 2008

Going from green to that in one morning is too much!  I hope we get some warmer weather and rain to get rid of this soon.   It’s too early to have snow!

Hopefully we’ll get our Moncton trip in before “winter”!  Official winter at least.

No, I didn’t get to work on the layout today.  We were without power this morning so it was too dark in the basement to do anything.  I cooked breakfast on the camp stove and went out to blow out the driveway and walkways when the weather calmed down around noon.  The snow was so wet and heavy it took a good 2 hours to get it cleaned up.  The power came back on about 3:00 this afternoon.  Then i worked on our outside door that was damaged in some high winds we had last weekend.  Will the chores ever end!

Tomorrow is layout day.  I have to get it cleaned up and ready for operating tomorrow evening.

Scott
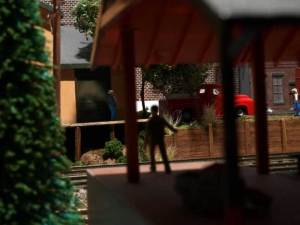
The Mine in Derwin’s Drop – pt. 1

mine-2-20081109I admit, this picture is more than a week old, but I haven’t had a lot of time to work on the layout, or take pictures.  I’m posting this just to demonstrate that I do work on the layout from time to time, mainly to give my brain a break. I don’t want any comments on that!

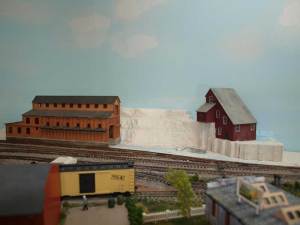
Anyway, I’ve been working all over the layout from Derwin’s Drop to Chappellton lately.  I’ll concentrate on the mine area in Derwin’s Drop in this post.  As you can see in the photo I have created a bit of a hill with one of the mine structures (I’ll call it the “Head Building”) built into it.  I had a few stone retaining wall castings on hand that I decided to use around the building.

There will be an access road in front of the head building to the tipple. I’ll need to build a platform and add some steps to get to the door in the side of that building. I hope to be able to put a couple company houses in the area to the right of the head building.  I also hope that I can add a realistic conveyor from the head building to the tipple (it’ll be curved so can that be realistic?).  It will require lots of wood supports and should make an interesting addition to the mine complex.

There’s still some plaster work left to do around the smaller structure before I can get on with painting and scenery.  I’ll have an update on this area in a week or so.

Scott
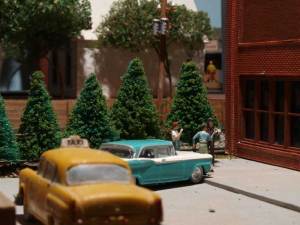
Playing With The Camera

My flash arrived the other day.  Surprise, it has a remote mode, and so does the camera!  The flash can be anywhere within a certain distance of the camera and it will trigger with the camera’s built-in flash.  So I had some time this afternoon to play with it in the train room.

For this first experiment I rested it, flash pointing down on a ledge behind the valance.  The results were interesting so I took a few shots around the layout just to see what the effect would be.  I was able to create some fairly realistic mid-day brightness and shadows.  standardelectric-2-20081109

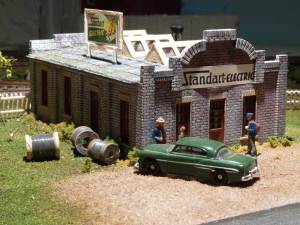
The first test was in Derwin’s Drop at Standard Electric. The remote flash is almost directly overhead.  The angle brings out some details you can’t see in the other pictures of this building, like the two signs bulging out (ugh!).  I’ll have to get those attached more securely.

I’d say it’s about noon as Fred and Bill are winding up their conversation.  Small town gossip has a way of getting around, especially when Albert, the mail man, overhears something good.  I’ll bet he can’t wait to get to Bessie’s place to fill her in on what he’s heard!

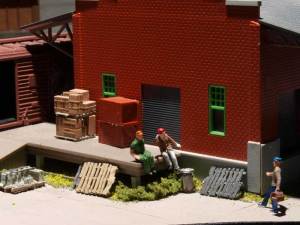
freightshed-1-20081109The next stop on my photo experiment was the freight shed.  Again the flash is almost directly overhead.  Notice how close the shadows are to vertical.  It’s a very bright day!

Chet is just returning from lunch as Tom and George are enjoying the rest of their break.  They’ve emptied 5 box cars so far and they have a mess of creates to put away.  The afternoon’s going to be tough, but thankfully there are no more arrivals expected.  You never know though, the West Bound is due through at any time and you never know what Derwin’s going to drop off for them (neither does Derwin, usually)!

cabin-1-20081109The last photo in Derwin’s Drop is at the cabin.  I like how the flash highlights the leaves on the trees.  I had the flash pointed straight down on the scene judging from the shadows.

It’s hard to tell from this photo, but Bentnose Willy always wears a hoody with the hood up to cover his face.  He has to protect innocent bystanders from seeing his face.  It is not a pretty sight.  It’s not his fault, of course.  He’s lived so close to Chemical Hazards for so long God only knows what he’s ingested to cause his deformities.

backlot-1-20081109The back lots of Stevenville was the subject of the next couple pictures.  This photo reminded me that I have to finish weathering some of my buildings.  Either that or I have to put up a cleaning crew scrubbing the bricks.  The trees in this picture cast some interesting shadows.

Edwin arrives home for lunch.  He lives in the upstairs apartment of this old building.  The basement used to be the warehouse for a long abandoned business.  Now its loading door is bricked up and it’s just used to store junk.

fromtheplatform-20081109This photo was taken looking across the Stevenville Station platform.  Because the flash was overhead it lit up the scene across the tracks but left the platform in shadows.

Big John yells over to Jake to come help unload his new bathtub.  Even though it’s hot Jake doesn’t mind helping.  John’s tub has been broken for almost a month and Jake can’t stand working beside him any longer!

parkinglot-20081109The last test was taken at the parking lot beside the department store.  The whole area is quite evenly lit but I see I have to clean up some loose grass.

Even though it’s a hot day the boys can’t resist a smoke and a bit of conversation.  I’m sure there’s more than one lie being told!

Well, that’s it for my photo experiments.  I hope you enjoyed the post!

Later!

Scott
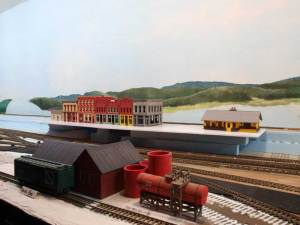
Operating – November 2, 2008

Sunday was the first operating session on the BS&T with my new camera (arrived on Friday).  So I had a great excuse to try it out and take lots of pictures.  Check out the gallery below and click on a photo for a larger version and description.

Scott
Proposed Development in Chappellton

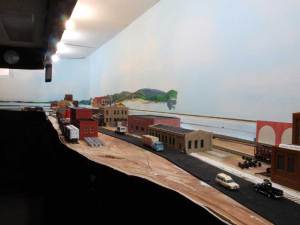
The other towns on the BS&T seemed to almost fall into place as far as building and street locations are concerned.  Once those things are determined the rest of the scenery just happens.  Chappellton, however, continues be a challenge.  It has gone through many changes since the layout was constructed as I tried to find track and street arrangements that I was happy with.  I am happy with it to this point, but I wanted to try something different here.  I wanted to have part of the town raised above the railroad with the station building on the raised portion and the passenger platform below.

ctbuildings-2-20081102So, I’m trying some things to see how I can go about doing that, but they all lead to one fact.  I have to move the tracks, yet again!  There is not enough room between the main line and the station siding for the walls and other structures required to support a raised section of town.  So, one of these evenings when I go into the room to do some work I know I’ll be tackling that project.

If you’ve been a very observant regular reader of this blog you might notice there are several “new” structures in Chappellton (the row of buildings just left of center in the first photo).  I was lucky enough to be in the right place at the right time when we were at the Truro train show a few weeks ago and bought several structures from Dara at a great price.  These will certainly help to make the town look a little less barren.

ctbuildings-1-20081102

The second photo shows two other structures (the large brick and the sand colored building near the center of the photo) that were built for the 5th Street Industrial District UMG modules.  They may as well be on my layout between shows rather than collecting dust somewhere.  Plus there’s a greater chance they’ll get finished than if there were packed away.

Next time I’ll have an update on a recent operating session on the BS&T.  Until then…

Scott
Changes in Derwin’s Drop

Here are some pictures to prove I have been working on the layout.  They aren’t dramatic changes, but change is change.

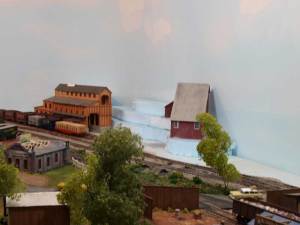
ddmycoal-20081102One of the last areas of Derwin’s Drop to be finished is the mine.  I’ve started by layering foam to create the base of a mountain.  The rest of the mountain will be painted on the backdrop.  I’m not sure who will paint it, or when.

The next step will be to carve the foam mountain to create rock details and then cover it with plaster and maybe a few rock castings.  The final bits will be coloring, grass, trees (of course) and other various details that would be found around a mine.

I know once I get into working on this area in earnest it won’t take long to finish.  So stay tuned!

ddengineshed-1-20081102This engine shed is a structure I made for our 5th Street Industrial District modules for the UMG.  Rather than put the structure in a box between shows I decided I could put it to good use as the engine shed for the service track in Derwin’s Drop.

I decided I wanted the back of the shed to look unkempt and wild so I added several different types of shrubs and bushes.  I used lichen, foliage clumps, and polyfiber coated with ground foam to make this area look “wild”.  A scattering of junk later will further add to the untidy look.

ddengineshed-2-20081102

You get a different perspective of the back of the shed in this photo. The area in the foreground is not intended to look like cut rock.  It is where the lift out is placed to cross the great divide of the doorway.

With Chemical Hazards in front of the shed it is difficult to get a natural angle when photographing it.  There are too many things in the way.  My little photographer will have to climb a tree later to get a bird’s eye view of the scene.

Well, that’s it for this update.  I’ve been working in other areas of the layout as well and I’ll have an update on that soon.  I never really know what I am going to work on when I first enter the layout room.  I intend to do one thing but usually end up working on something else.

’til next time!

Scott