Trees, Yet Again!

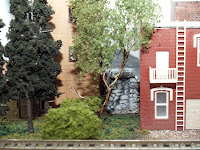
Sorry for another post about trees so soon, but I had to share these ones.

I had read about using sagebrush twigs as model tree stems and tried to find an inexpensive source of twigs. All the commercial sources I could find were quite expensive. Then, one day I read a message from a guy in British Columbia who offered to send some twigs to someone else for the cost of shipping. I quickly shot him off an email asking if he’d consider the same for me. He said he would. A few weeks later a very large box arrived at my door full of fresh picked sagebrush twigs. The cost of shipping? Only $15!!

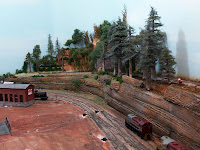
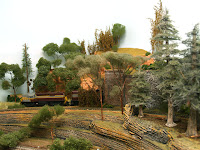
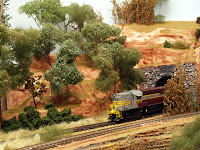
I made a few trees with them shortly after they arrived. Being the nice guy I am they ended up near a river scene on Derwin’s layout – Canadisle Rail.

Considering I’ve been on a tree making binge the last couple weeks it was inevitable I’d pull out a few more of those twigs. When you start making a tree you never really know what it will look like in the end. I’m always surprised that they rarely look like I picture them at the start of the process. They always look good, but not like I imagined.

These newest sagebrush trees completely floored me when I finally got the leaves on them. So much so that I’m not sure if I’ll risk taking them to the Truro show. Brian was in for a visit the other evening and his comment was that they were the closest thing to a real tree he’s ever seen. I hope you agree.

I used the same process that I use for all my deciduous trees. The only thing different about these is the realism of the stem and the branching structure.

Scott

Trees. More Trees!!!!!!

Well, sticking with my resolution to have trees for my UMG modules at the Truro Train Show in October I have been fairly busy. I’ve spent quite a few evenings since MudFest making trees while watching TV.
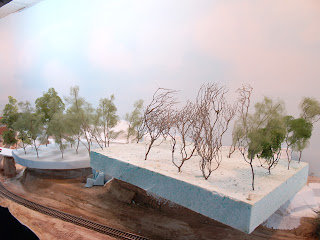
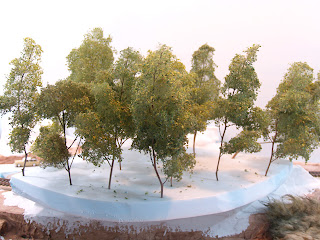
Two groupings of future trees.

I use natural materials for tree forms. The trees in the background are made using the dried flowers of False Spirea. I harvest these during the winter when the old seed pods are very dry and crumble off the stem easily. The trees in the foreground use a type of plant that I don’t think we’ve identified yet. They grow in, amoung other places I’m sure, the field behind Jon Huneault’s house in Aylesford, N.S. They have lots of fine branches and look like a very bushy tree.In either case, I use Woodland Scenics Polyfiber for fine branches. Pull a small amount of the polyfiber off the bunch and roll it into a tight ball. Then start pulling it out, teasing it, until you have a very light and airy puffball. It should be teased out fine enough that you could lose it if you dropped it on the floor. I make a bunch of these, some small and some large for variations of branch sizes before moving on to the next step.

I put a fine coating of white glue on the branches that I will be attaching the polyfiber puff balls to. Then I either skewer the puffball with the branch or drape it over the branch. You can leave some branches leafless to simulate dead branches.

Remember the leaves of some real trees do not go around a branch in a perfect circle. You should also remember that not all trees are perfect globular forms. Real trees can have branches sticking out at odd angles and have clumps of leaves outside the main canopy of the tree.

The final step is to apply the leaves. I used to use cheap hairspray as adhesive to attach leaf material. It’s fine for trees that get planted on a home layout and never get moved, but trees that are transported for a portable layout need something more. Lately I’ve been using clear, mat wood finish (Varathane). It’s a little more expensive than hairspray, but I think it will hold up better.

I use different leaf material depending on the type of tree I’m attempting to replicate. I use regular ground foam for smaller bush type trees – ones that typically have smaller leaves. For larger trees I use a product I discovered a couple years ago by accident – leaves from Selkirk Scenery. If you’ve never visited Bill’s site before you should check out his “How To” links. He makes some incredible scenery!
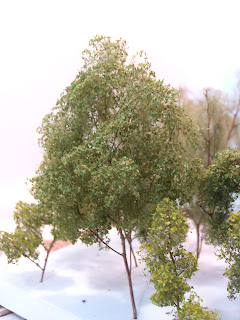
A tree made with Selkirk Scenery
leaves and False Spirea stem.

Anyway, spread out some newspaper to protect the floor from the adhesive and to catch excess leaf material for re-use. It’s a good idea to have two areas of newspaper, one for spraying and one for excess leaf material. I start by spraying the underside of the tree and sprinkling a darker shade of leaf material over it, from the bottom up. This will simulate leaves shaded by the upper branches. Shake off the excess leaf material and spray another coat of adhesive to secure the leaves. Now, spray adhesive from the top down and sprinkle on a lighter shade of leaf material. Shake off the excess and spray another coat of adhesive.

Once the adhesive dries the tree is ready to plant.

It may take a few trees to get the knack of which colors work best for your layout, and your lighting conditions. Before you know it you’ll have a whole forest of trees on your layout.
I’ll have more on making trees in future posts.

Have fun making and planting trees!!!

Scott
Picard Packers & Operations

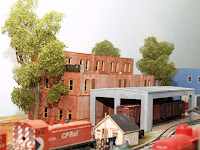
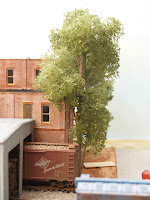
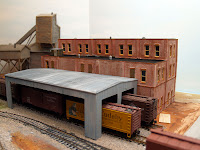
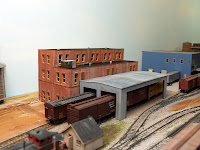
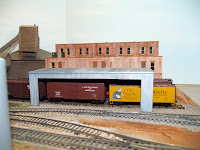
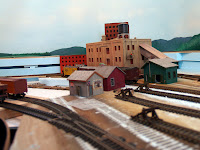
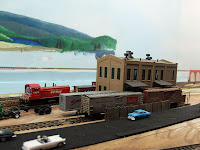
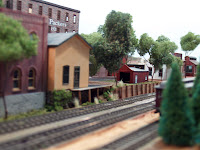
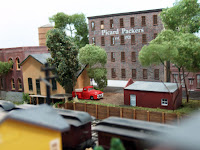
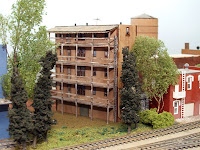
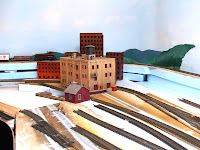
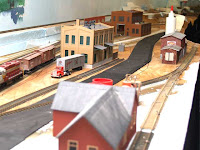
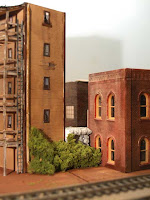
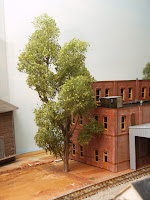
Finally – I have some pictures! The new building for Picard Packers is more or less finished. I still need to do some weathering and scenery work around the building, but here are some pictures of it as it sits now.

The main structure is made from sections of a DPM bulk pack. The rear of the building is just plain matt board since it will “never” be seen. The loading dock shelter is a modified Pikestuff car repair shop.

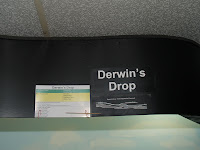
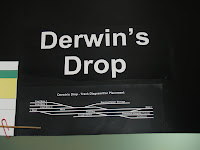
In an effort to try to make operations as stress free for operators as possible I am trying many different things on the BS&T. In these images you can see two of these things. The first is the multi colored sheet that lists the towns in each direction (East & West) as well as the expected order of trains through the area. The other new item on the valance is the track diagram showing the industries and sidings and their intended purpose. These items should help acquaint new operators with the layout and operations.

Speaking of Operations….

The BS&T saw it’s first operations since I completed service on the nearly 140 freight cars on the layout. The maintenance identified that almost 90% of the freight cars had wheels that were out of gauge, quite a few with trucks that were too tight to the bolster, only a few underweight cars, and a lot of dirty crud. There is a large pile of old wheelsets outside Fixum Car Repair as a result of this process.

As a result of the maintenence process there were certainly fewer derailments, especially at one pesky little spot on Daredevil Ridge. I think the new rule about stopping at the start of the grade and proceeding slow helped there as well. Part of the problem on the ridge was a turnout with points out of gauge. There were a few other derailments in Stevenville with the same cause. I’ll check those turnouts as I install ground throws on them before the next operating session.

The first operators to arrive last Sunday noticed a strange smell in the air. I had just completed wheel cleaning on most of the locos and the smell of rubbing alcohol was fairly strong. Dirty loco wheels was one of the things that caused problems during the last op session and I left it to the last minute, of course.

Well, that’s it for this update. Later!

Scott
Posting For No Good Reason

I am creating this post for no reason other than to thwart some of the emails I will receive if I do not. Ha!

Other than working on freight cars this week I haven’t done much on the layout. Last Sunday I started a new building for Picard Packers – putting some of my DPM Bulk Packs to good use. I hope to get most of it finished this weekend.

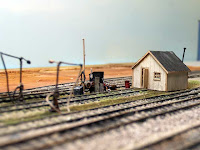
In the way of pictures I will cheat and post some I didn’t use last week.

I’ve decided to call this area “DareDevil Ridge”, at least until I think of something more suitable.

I haven’t done much in the harbour area around Chappell Seafood in quite a while. But this should make a good “before” picture.

I have done a little bit of work to the Fred-Ex building. A couple weeks ago I put a foundation under it and started working on a fence along the street. Eventually there will be a fence all around this building with gates for freight cars and trucks to load and unload.

So, there it is – a post just for the sake of making a post. I should have some pictures of the new Picard Packers factory next week. The old one has been cut down in height and placed in the town of Stevenville where it will be the Corporate Headquarters for the conglomerate.

So, until then….

Scott
Better Late Than Never

I know it has been more than a week since my last update. I’m sorry, okay!? Life has been a little busy lately.

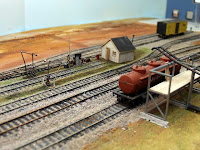
I finally got to the basement on Saturday and spent about 6 hours there. I went down with the intention of working on cars – checking weight. wheel gauge, couplers, etc. – but saw all the stuff not unpacked from the Moncton train show. So, I went about doing that and saw half a box of trees that I hadn’t unpacked and thought I’d put those in Stevenville. Well, I figured Stevenville needed a little scenery work before I planted the trees. Four hours later I still had not worked on any cars but part of Stevenville had grass, there’s a bit of a weedy mess around the tenement, and the main line tracks through town are ballasted.

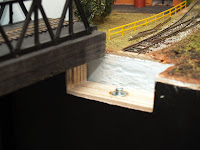
Then I decided I’d install a bolt alignment system for my main lift-out. I needed something very long in order to be able to adjust them through the benchwork. So, off to Canadian Tire to pick up a couple 8″ eye bolts and nuts. The nut is countersunk and epoxied into the main support for the lift out (centered side-side and front-back). The eye bolt goes up from the bottom of the benchwork into the nut. A few turns and no more shims needed. Works like a charm! So far I haven’t had any horizontal alignment problems. The notch for the lift-out is a very snug fit from side to side.

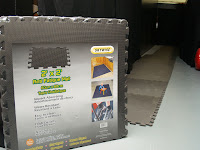
Since I’m in the tip giving mood, here’s a floor covering solution I found. Tired of sore feet and legs from standing for long periods in a room with concrete floors? I got these inexpensive anti-fatigue mats ($10 for 4 sq. ft.) at WalMart, but I’m sure other stores carry them as well. You really notice the difference when you walk form these onto bare concrete.

Sunday was spent doing an actual cleanup in preparation for the operating session that evening. I took 2 shopping bags of compostables and 3 bags of waste out to the cans! After 4 hours of work the train room sure looked tidier than it had! The next cleaning project will be the staging room/dispatcher’s office/storage room/paint room/… (and it’s only 6′ x 8′)!

I hope I have redeemed myself with this post. Happy modelling!

Scott
Ground Throws & Montain Scenery

Well, after the 1st anniversary operating session on the BS&T I vowed I would install ground throws on all my turnouts before the next op session, before I did any more scenery work. So far all the turnouts in Chappellton and Kenville have ground throws installed (about 30 turnouts). Then I hit a snag. I have no more ground throws! I might strike a deal at the Moncton show, so until then it’s scenery time!

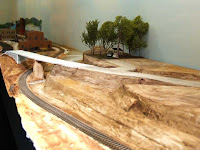
I started at the tunnel coming from staging. The basic land forms were done a few weeks ago so all I add to do was color the earth and add details. This is what it looked like when I started. Pretty bland.

And this is what the area looked like after a few hours of work.

It’s amazing what happens to a picture when you have the white balance settings in the camera wrong. The layout lighting in these two pictures has not changed, but look at the difference with the white balance set for fluorescent (left) and auto (right).

The long grass is an idea I got from Harold Minkwitz. It is faux-fur from Wal-Mart dyed with Dye-Na-Flow fabric paint.

I’ll be getting ready for the train show in Moncton next week so I’m not sure if I’ll have an update. I will next week though with some pictures from Moncton, at least.

Scott
Roundy, roundy

One thing I like about looped layouts is that when you have someone in to visit you can start a train moving and let it run unattended – at least until a derailment happens. I have not been able to do that on the Bayside and Tidewater, until now. The loop track was completed last Thursday evening. This track also provides access to the layout from staging. Trains from “points east” must run 1.5 times around the layout, roughly 100′, before reaching Tidewater. I’ll try to employ some scenic separation ideas and hidden track to disguise the fact that it’s going through a scene twice. Derwin completed the staging yard last evening.

The picture below shows the new location for Chappell Seafood. You can see the loop track running behind Chappell Seafood. I’ll use buildings through Chappellton to hide the loop track as much as possible. The area just in front of Chappell Seafood is the yard storage and warf for the new barge. The harbour will be to the left of Chappell’s.

Turning 90 degrees, you can see some of the other changes in Chappellton. Der-Win Coal and Oil is in the foreground. The lead track for it is also the storage track for Naylor’s Nails. That should make for some blue language during operations. :-).

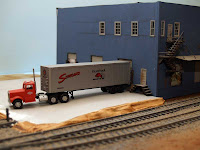
The two storey building with the truck parked at it is Fred-Ex and behind that is Fixum Car Repair.

The disguised hole in the wall is the entrance to staging. Behind this hole is a 5 track, 6 foot long, staging yard. It’s a little small, but we’ll be able to make do.

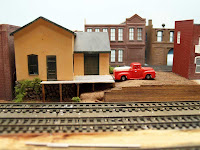
The building flats at the far end of Stevenville hide the loop track as it rises up into the city. Clayton made these up as fillers for the city, but I think they may work out just fine here.

There have been so many things to do that I only do a little bit here are there. So there’s not a huge amount of change in any one area. You can see that I have done a little scenery work around the tenement building.

Until next time!

Scott
2 Weeks since last pictures!

It has been two weeks since I took pictures of the BS&T. As you can see, there have been some minor changes and some major changes.

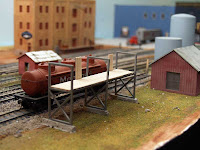
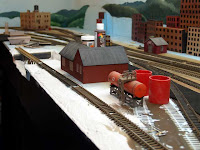
In the minor changes department, the Stevenville engine service track is starting to take shape. The little building was scratchbuilt in two evenings. I’m hoping to have enough space between tracks to put a fence and gates around this area to make it more secure. The second photo (right) shows the developments on the oil dealer’s track with a loading/unloading platform.

In the moderate changes department is the harbour area in Chappellton. Chappell Seafood has been relocated to this area and will have part of the siding on a warf. The barge will have a small yard to facilitate loading and unloading freight cars. I’ll likely build a small freight house for this area. The barge has not been built yet.

Derwin Coal & Oil has been relocated as well. It’s right up front now so will require lots of detailing. The little bit of detail I have from the original Derwin Coal doesn’t go far in the new version. One things operators may not like about switching this area is that to get a coal car off the ramp they will have to pull one or two other industries to clear a lead and then pull tank cars spotted at the oil tanks.

FredEx has a foundation so cars now fit under the awnings. It hasn’t moved much from its original location.

I think I’ve come up with a name for the rural area between Chappellton and Kenville. I think Shiner’s Road might be fitting. The one idea I will incorporate into the layout resulting from our trip to Saint John last week will require some changes to this area. The moonshine still will have to be moved to make way for tracks from staging

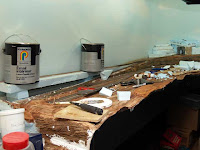
In the major changes department, Kenville is a mess! You can see the tunnel entrance in the upper right of the photo where trains will enter the layout from staging. You can also see the future location of the east bound main to staging under the paint cans. Ugh! More blue foam to cover up!

So, there you have it. This weeks summary of the continuing saga of the construction of the Bayside & Tidewater Railway. Hopefully I’ll have more next week.

Scott

No pictures today

I almost didn’t make an entry this week. There haven’t been any big changes in the last week so I didn’t take any new pictures of the layout. Just so you don’t think I was lazy all week …
I built a little shed to put at the end of the engine storage track in Stevenville. It’s a little too big, I think, so I’m going to build another one. The new one will have a couple side doors that will be open to view a slightly detailed interior. I have some etched brass tools and some welding equipment that would look really good around a workbench. Because this area is close to the aisle it’s a prime candidate for some extra detailing. I also assembled and painted a Woodland Scenics fueling station kit and placed it beside the track.

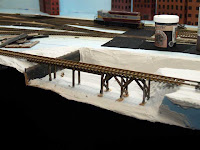
The big hole in Chappellton where the harbour will be now has a bottom. I still have to seal all the gaps before I start detailing the seawalls, bridge abutments, and building the warf. There will be lots of track in this area since I’ve squeezed in a small yard for the barge and Chappell Seafood. The siding for Chappell’s will actually be out on the warf.

I’ve completely rearranged the industrial sidings in Chappellton. I am much happier with this arrangement than I was with the previous 4. It makes way for a nice arrangement of streets and buildings. I moved every building I had to this area and started moving them around until I had something I liked. Then I figured out how I could get tracks in there to serve the businesses. There should be some interesting switching challenges here.

Tomorrow (Feb. 24th) the Half Nuts gang will be hitting Saint John, N.B. for a day of layout visits and operating. It’ll be really nice to operate on a couple of new layouts and see some different scenery techniques. I’m sure we will leave there with lots of new ideas. It may even result in a little bit of destruction on a couple local layouts.

The guys are coming over Sunday evening to continue scenery work, so I’ll have lots of pictures next week.

Later,

Scott

A little progress

Well, I had hoped to get a little more done before this update, but the week hasn’t been cooperative. But, I did promise to post a weekly update, so… Major progress or not, here it is!

Greg started working on detailing the oil dealer in Stevenville. He got the platform constructed Sunday evening, and will work on adding extra details and piping over the next few weeks. It’s already starting to look good!

A couple Sundays ago Derwin added the parking area for G-Mac Transfer. Not much has been done to it since then.

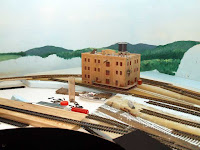
The tenement structure itself is pretty much done. This structure has turned out quite well. Can’t wait until all the details are added to the surroundings.

Here’s another little scene that’s starting to take shape. Clayton started working on this a couple Sunday evenings ago. It’s really coming along and should add lots of visual interest.

Derwin started getting Kenville ready for ballast.

Brian is progressing on his rural scene.

I was in a destructive mood last Sunday. I tore up about 1/2 the track in Chappellton in order to add the harbour area. It’s still a mess, but I hope to get things back together over the weekend. The car float/ferry will be a major addition to this area.

Here’s a close up of the future harbour area.

So, that’s it for this week. It’s great having a bunch of guys working on this. Rather than one scene developing at a time, there are several scenes being worked on at the same time over the whole layout. I love it!

Later!

Scott