E-Pass #5 – The Northern Pacific N-Scale Railroad

043epass.jpg
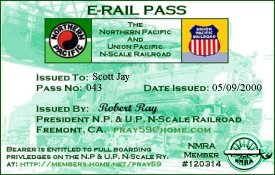
In May of 2000 Robert Ray sent me this E-Pass for what was then known as the NP & UP N-Scale Railroad. He has since changed the name to The Northern Pacific N-Scale Railroad.

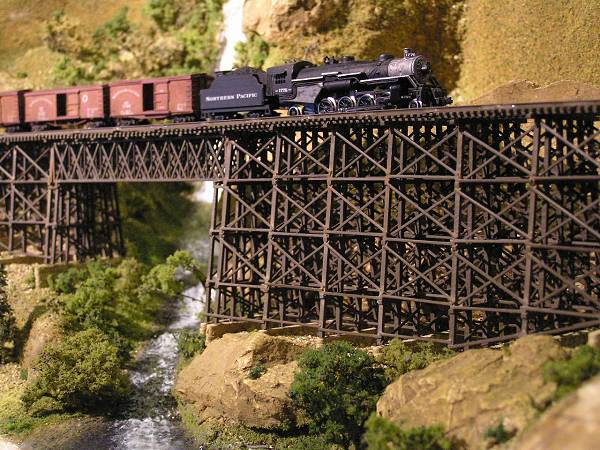
I have been accused of being hard on N-Scalers, but it’s just healthy banter among friends (really Allan – I am only kidding. Well, most of the time anyway. HA!). Robert Ray’s N-scale layout is a wonderfully detailed model railroad! I’m am continually amazed at the tiny details that are available in such a small scale.

Now, after saying that, Robert is also working on some Z-Bend Track Modules. N-Scale is one thing, but to be able to work in Z scale is totally incredible! I used to think N-Scalers were crazy, but Z scale takes the term to a whole other level (remember – healthy banter). The level of detail that Robert has put into his module is unbelievable! Yes, the items in that picture are Z scale (click the picture for a larger version)!

His “Projects” page includes a lot of loco and freight car builds and modifications. It even includes upgrading the details on Z-scale locos! The highlight on that page for me is the construction of his Drive-In theater that plays real movies on an LCD screen. Very cool!

I now have a new respect for Z-Scalers (not that I had little respect for them before)!

You should stop by Robert’s site. It is certainly worth a visit! (click the E-Pass to go to Robert’s web site)

Scott

Ballasting at the Scratchbuilder’s Guild

Well folks, Ron Pare invited me to be a contributing author over at the Scratchbuilder’s Guild. I must say that I was flattered by the request. I did have a concern that the BS&T blog might suffer because of it, or that I might not put my best effort into the Guild. After some consideration I think I can do both without taking away from either blog. So, I’ll be writing how-to’s and kit reviews for the Guild, and link to them from here. I’ll still post BS&T updates and operations reports here as I’ve always done.

My first assignment, that I chose from a list of possibilities, was to do a series on scenery. Since I was at the scenery stage in Derwin’s Drop I thought that would be a good one to start with. My first topic is ballasting – how to go from this…

thearea.jpg

to this (the glue is still wet)…

ballast-step-9.jpg

So drop by the Scratchbuilder’s Guild to read about Ballasting Your Layout.

Scott

Inspirations #5 – The Sipping & Switching Society of NC

When the UMG (Un-Named Modular Group) first formed, the Sipping & Switching Society was one of the first websites I visited for information about building modules. I was extremely impressed by the quality of their modules – both in their construction and scenic details. You have to love their 8 foot radius curved modules – a 60″ minimum radius!

Their site disappeared for a a while, but there were other sites that had a few S&SS resources, like TrevinoCircle’s link to their tree making instructions.

Welcome to the non-conformist, iconoclastic but ever so tasteful world of the Sipping and Switching Society

Their site is gone now but if you can find photos I really like their waffle construction methods and their ideas for running rails right to the module edge negating the need for fitter rails between modules.

The UMG shares a lot of the same tenets that the S&SS has. About half way down their main page they talk about their group structure, or lack thereof. Basically, no formalities equals a happy and cohesive group. The group does not “own” anything and there is no “political” organization within the group. As long as modules are built to a basic standard they can be included in group layouts.

They have some track plans from past shows, and a few pictures of their modules on their site. I’m sure if you look around the internet you’ll find more photos of their very impressive layouts.

Scott

Operating – Feb. 10, 2008

Unfortunately, or perhaps fortunately depending on your perspective, we were short a couple operators last evening. I was pressed into service on the East Bound Wayfreight and did not have time to take any pictures.

Brian wanted to give the new wayfreight instructions a workout so he ran the opposing wayfreight. His start was delayed because of, who else, Derwin wanting to make up his transfer at the same time Brian was making up his train. When he finally got on the road, Brian wasn’t long making up for lost time.

Derwin decided to run something “simple” for a change and took the Wholeinthall Turn and Transfers. He quickly realized they weren’t as simple as he first thought. Once the Wholinthall Turn and transfer from Bayside arrive in Tidewater they must be sorted into a return train to Wholinthall and the return transfer to Bayside. There is quite a bit of yard work involved with these runs.

Greg chose the local job in Chappellton. It was a slow day in Chappellton so he ended up also switching in Kenville and Derwin’s Drop and provided helper service over The Ridge.

Tom, the newbie, flew solo in Stevenville. Unfortunately for him, Stevenville was extra busy. He had about 14 cars leaving town, 10 cars coming in, as well as a couple local moves. Being unfamiliar with a town is one thing, being new to operations adds to the complexity considerably. You did great Tom!

Running a full session solo during the past week helped to identify several trouble spots. I got most of them fixed as they occurred so there were fewer problems last evening. But there were a few things, both expected and unexpected, that popped up. I think that in the 3 weeks until the next session on the BS&T I will run another solo session to work a few more kinks out.

For all we did quite well. The shift was done about 10:00 after about 2.5 hours of operating.

Later!

Scott

E-Pass #4 – Westport Terminal

60_scott_jay.jpgWolfgang Dudler sent me this e-pass for his Westport Terminal layout in June of 2000. His site and his layout have developed quite a bit since then. One of the most interesting things he’s added are videos of his layout in operation. The “Switching Third Street District” video (about 3/4 down his video page) is my favorite. Listen close at the end of the video for a little surprise sound from the little 44 ton switcher. I’m still amazed he managed to get a sound decoder in that little switcher! Apparently it is a Loksound decoder.

Looking at his work you’d never know that he has never been to North America. He must have a ton of reference books loaded with photographs!

Wolgang has several pages of photos of the layout on his site that are worth taking a look at. His attention to detail is incredible. He also has several “how-tos” on his site from making turnouts to making movable switch svr_022.jpgstands. His method of adding power pickup to coal tenders is one I’m going to try on my Proto 0-8-0.

The pass I sent to Wolfgang was my #22, sent a few days before he issued mine.

Visit the Westport Terminal Railroad today.

Scott

Inspirations #4 – Joe Fugate’s Siskiyou Line

I’m not sure if it’s the layout or the person that has inspired me the most. Joe has built an amazing representation of what the prototype “may” have been if it had been built “as planned”.

The scenery on the layout is beautifully done and its operations seem to be very smoothly orchestrated (well most times anyway). Joe has many videos available for sale on topics ranging from layout construction to operating. From all accounts the videos are worth their weight in gold.

Joe is always willing to share his knowledge with others. He has created a forum where he, and many others, can share their skills and help other model railroaders with their challenges. I especially enjoy his op session discussions. The banter that goes on between operators seems oddly familiar! Ha!

It is definitely worth a visit to Joe Fugate’s Southern Pacific’s Siskiyou Line web site! I encourage you to drop in on his forum discussions from time to time as well. You will not be sorry you did.

(Editor’s note: the website is no longer functioning)

Scott

Good News and Bad News

The good news is that Derwin got his power back yesterday about 3:00pm after being without power for 4 days.  Unfortunately, there are still folks on the Island without power and the electric utility is saying it’ll be until tomorrow (Sunday) at least before they get the power on to all residents.  It’s a good thing the weather is still fairly mild, if you call just about the freezing mark “mild”.

The bad news is Moncton had a fairly major freezing rain storm early this morning.  So the guys there decided to postpone their trip over.  Hopefully we’ll have a good March and they’ll make it over then.

Meanwhile, the BS&T is all ready for operating and it is yelling at me to get some trains moving.  I even prepared a new report for my ops program to make the job of the wayfreight crews easier.  The paperwork they had previously showed only part of the work they had to do and it wasn’t organized well.  It wasn’t really intended to be used for a wayfreight.

So, I spent some time this week adding a new table to the database to record the direction (East/West) from and to each town.  Now the paperwork is very efficient and shows the crew what they have to pick up and drop off to each switching area.

Oh well, I’ll have time to get more scenery work and some other maintenance tasks done before our guest operators arrive.

Off to the train room!

Scott

Derwin Drop Scenery – The Mad Rush

2008-01-30-dd.jpg

I’ve been working in Derwin’s Drop a lot this week. Why the rush, you ask? We have some guests coming from Moncton on Saturday for a day of layout visits and operating, so I wanted to get rid of the last little bit of all-blue foam on the layout. With the recent changes to the track arrangement there I was ready to start scenery.

2008-01-30-road-1.jpg

Anyway, last evening I painted the road and the base for the freight shed. I am planning to put a layer of plaster over the road to try Harold Minkwitz’s cracked road method, but I won’t get that done before Saturday, and I wanted to tone down the black foam. I dry-brushed a coat of “Linen” and “Grey” acrylic tole paints over the road. It seems to work, for now.

2008-01-30-road-2.jpg

The “Linen” tole paint looks pretty good for concrete as well, so I painted the freight shed lot with it. Then scribed some expansion joints and added a cost of india ink/alcohol mix.

2008-01-30-fs.jpg

I painted the fence at Chemical Hazards. It’s hard to tell that it’s just a bunch of 2.5″ air nails. They look fairly good as a board fence.

2008-01-30-ch.jpg

The surrounding “land” got a coat of dark and light brown tole paints to get rid of the blue foam look. Grass, secondary roads, bushes and stuff will come later.

I’m happy with the area for now. It’s far from finished, but it looks a lot better than it did before.

I’ll have a post about our Moncton visitors next week. Until then, stay warm (P.E.I. Hit By Major Ice Storm)! Hopefully Derwin gets his power back before Saturday so we can operate the Canadisle Rail. Oh, and so his family can eat and be warm too!

Scott

Big News!

Well, the news itself is not big, but the subject is.

I received a phone call last Saturday from a gentleman in Kensington who we’ve visited and helped in the past. He wanted to sell all of his train stuff and wondered if I knew anyone that would be interested. I knew Tom was looking to buy some stuff so I gave him a call and we headed to Kensington.

I knew this guy had some larger scale stuff but I thought it was O-scale. Then I saw the G-scale track and little steamer.

Kim’s been wanting to set something up in the back yard ever since she saw Dara’s garden layout in Amherst, N.S. (http://www.geocities.com/greencrowrailway/ ). I’ve wanted to as well, but have been reluctant to use my HO-scale money (the money is full scale, the purpose is for HO trains) on G-scale stuff.

The price was right, so I took it home. Sure, it is LGB brass track and a very toy-like LGB steamer and coaches, but it’s a start and (did I mention) the price was right.

So, stay tuned this summer for updates on the, yet to be named, garden layout. Anyone have any suggestions for a good P.E.I. themed garden layout?

Scott

Grade Crossings and Roads

I’ve been using a different method, for me anyway, for roads on the BS&T.

On my old layout I used a lot of plaster to build up streets and roads. It was a lot of work to try to get them smooth enough to resemble a road. Then if something happened to chip the plaster you have an odd coloured pothole.

So, I used a tip I read on Harold Minkwitz’s web site (Inpirations – Dirt Roads, Bushes, and Grass). He uses 1/8″ craft foam for streets. You’ve likely seen examples of these streets in other posts on the BS&T Blog.

One of the best uses of this product is for grade crossings. The foam is the same thickness as code 100 rail (sorry for all you more scale conscious model railroaders using smaller rail <wink>) so it makes perfect grade crossings. All you need to do is hold the foam in place and run a sharp knife along the rail to get a perfect fit. Anywhere you need a gap for wheel flanges just trim the foam a little narrower.

2008-01-28-gradecrossing-2.jpg

This grade crossing (below) in Derwin’s Drop would have been almost impossible to do with plaster. I wouldn’t have even attempted it. But I did this the other evening in about 20 minutes.

2008-01-28-gradecrossing.jpg

The wheel flange clearance may be a little tight, but the foam gives enough that I don’t think it’ll give me any trouble. I ran an S-4 through this about 10 times, at different speeds from a crawl to normal speed, without a hitch.

I’m going to try Harold’s method of making old cracked pavement in this area. He applies a thin layer of coloured plaster over the foam, paints it to simulate old asphalt, then presses on it causing the plaster to crack. Instant stress cracks. Then pick a few pieces out to make potholes.

Later,

Scott